Christmas comes the same time each year. This reality is both awesome and terrifying for those of us charged with forming a moment around the story of Christmas. Part of our strategy is centered around creating environments that reflect the season including our stage set design. This year our conversations creatively had all focused on the need for a warm, cozy look. And we struggled. The ideas we had, no one truly loved. But as the day for “idea execution” drew closer, we were resigned to what we had. Then this popped up in a feed I was looking at…
 …and an idea was born.
The crates would give us the feel we were looking for, but we needed them on a massive scale. We began with a design. After two gatherings of the minds, our stage designer went to work laying out our plans in autocad. Here’s a few of the drawings. Keep in mind that we did not pay attention on the drawing to the gaps and reversals of crates. We decided to do that on the fly based on the eye test.


Chasing of Crates: Then the chasing of crates began. Calls were made. In the end we ordered nearly 500 crates from Home Depot (Model) and had them delivered to our campus on the first day of stage construction. (We may have bought every crate available in the Las Vegas valley). Be aware there may be some flawed crates when you buy in bulk.

Walls of Crates: The crates were screwed together using 1″ black drywall screws. We also used small 1″ x 8″ blocks to fill in the spaces where we left a crate out. We also learned that if we wanted to create a gap, we merely removed the slats on the crate and created the desired hole. All of it was built in sections by teams on different parts of the stage simultaneously.
 Longer Than You Think: We had 12 people over the course of 8 hours assembling the various crate walls. In addition our rigging team was standing by to begin the tying off and the lifting of the center rear wall. The size of this piece meant we had to build it from the top down and using our motors, lift each section and then insert the next underneath. We repeated this four times to complete the back wall.
In addition, we wanted to create a lyric screen center. We used a basic charcoal grey stretch muslin from Joann’s Fabric as our surface. It is dimmer than we would prefer, but the lyrics are used as an auxiliary and we did not want the bright white effect in that position. By the end of day one, all the walls were in place and rigged for safety and stability. Kickers were added to the back walls with sandbags.
In addition, as the walls were going up, we had 2-3 volunteers who were randomly staining various fronts of the crates. This was done to add a bit of a color contrast when they were washed with color and add the desired depth.

It’s All In The Lights: Day Two was spent placing and wiring over 70 Edison bulbs. We used Hemma Cords from IKEA and ordered 4 different type LED Edison bulbs from Amazon. It was important to us that the LED Edison lights were able to be dimmed and we ordered accordingly. It did become a bit of a cable jungle behind the walls, but we spent time cable tying and crimping the cables to the rear of the crates.

Final Touches: Day 3 was a lighting day including positioning our LED pars and Colorblast. By the end of day 3 we were able to complete the stage, adding some twinkling trees (Amazon) to give it a Christmas vibe.
Here’s some truths:
- This set is a bit more expensive than we would normally spend. However, it will be used for the month of December through our Christmas services and then continue to be used (minus the twinkling trees) through February. We were able to spread out budget for stage design out over both our Christmas budget and normal stage design.
- The construction of set required “all hands on deck”. We had a tremendous volunteer and staff team that were necessary to make it happen. It was not difficult to make the walls happen, but time consuming.
- We flipped the crates and left crates out in order to create dimension. We did not feel a solid crate wall would have the same effect.
- The addition of the Edison bulbs was huge win.
- The staining of of select crate fronts was crucial to the overall look.
Bonus Material:
- We added crate formations throughout our campus and lobby, some in the form of trees.
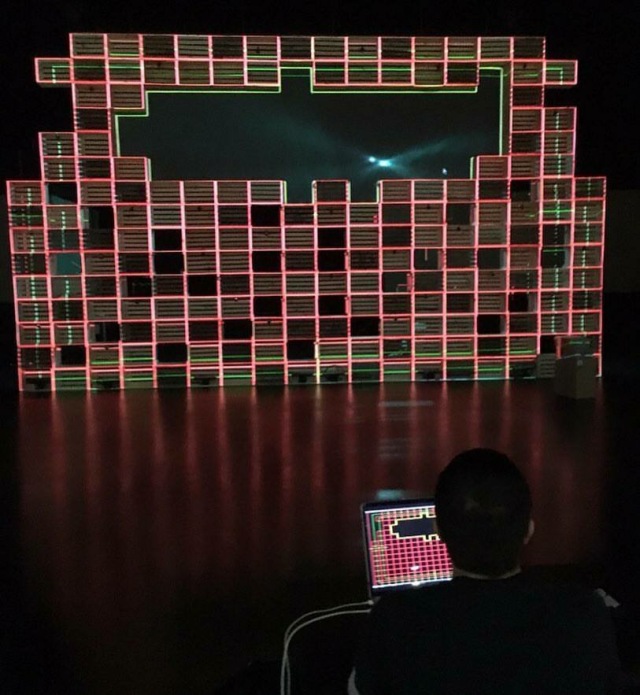
- We are using the crates and adding screen lids (available at Home Depot) to create a mapping projection surface. Going to introduce this during our Christmas services.
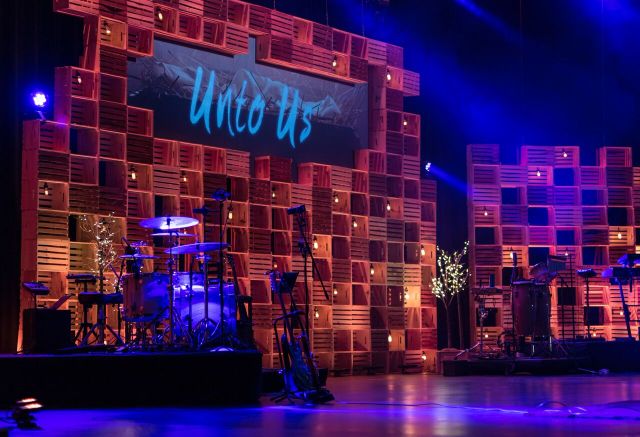
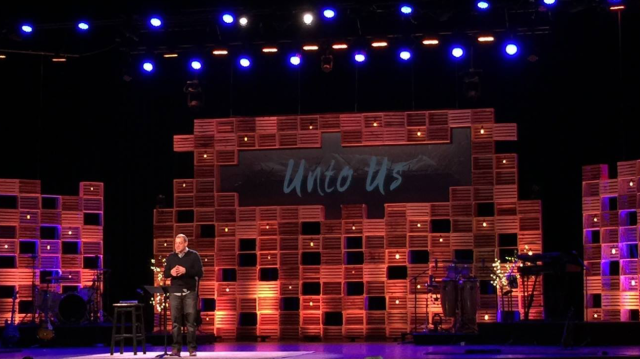
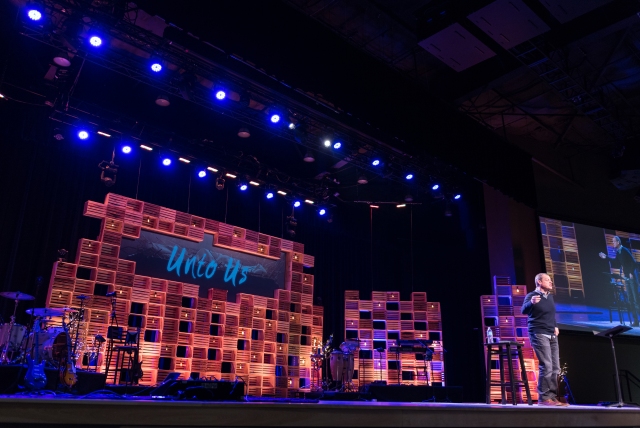
Here’s some finished pics. Enjoy.